4th Gen Subaru Legacy Single Din Headunit
Guide on how I installed a single din headunit into a 4th generation Subaru Legacy/3rd generation Outback.
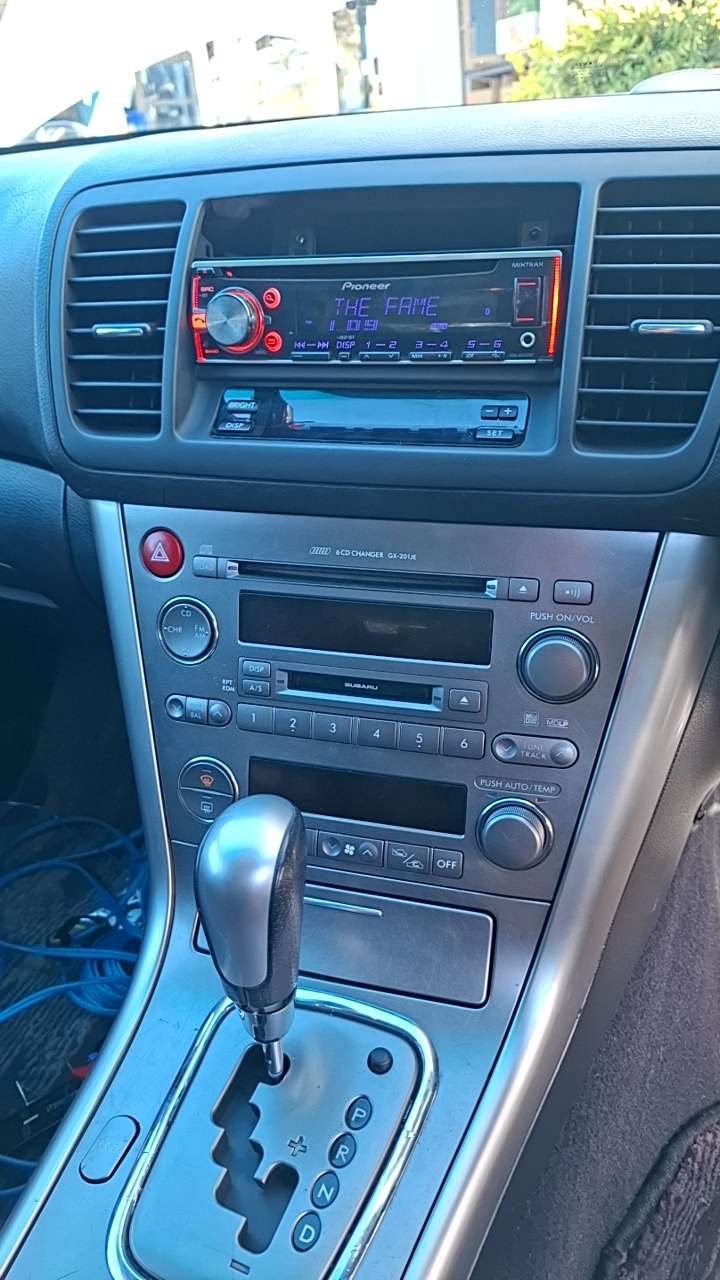
Shopping list:
- Single din headunit (got ours from marketplace for $80)
- Respective wiring harness from headunit to stock connector (Aerpro APP090 worked for us)
- Second factory headunit harness side (got ours out of a wreckers. this looks correct too)
- Scrap sheet metal to make mount
Rough instructions:
- Take apart center cubby and factory radio, tutorials are on YouTube, but you will have to take apart shifter surround too.
- Poke wiring adapter up through a hole on the right hand side of the spot behind the cubby and connect to headunit and to stock car connector. Test to ensure that the radio works. Climate controls won’t function as it uses the 12+ and GND from the headunit connector.
- Once tested, get second male (car side) connector, and splice pins, 10, 11, and 1 to the respective pins on the wiring adapter. You basically want to make sure all nessacary wires are going to the new headunit, AND 12+, GND, and Illumination are going to the factory unit as well.
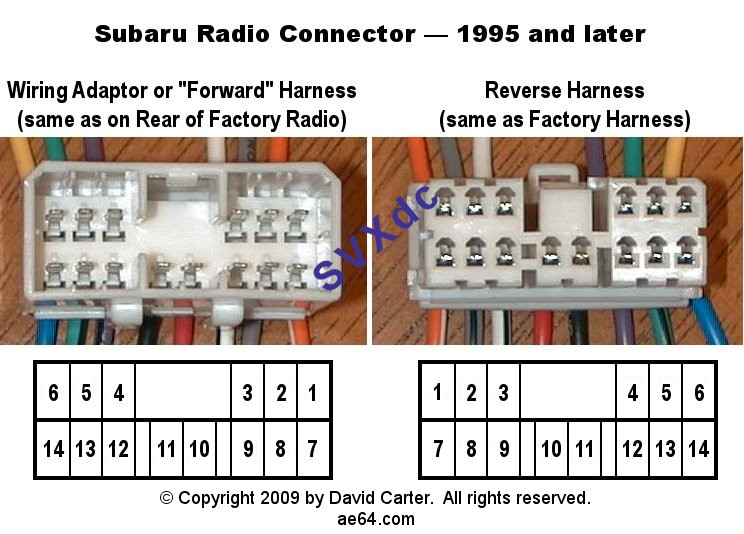
- Double check the 3 wires you spliced are not crossed, and test again. With any luck you’ll have a sweet single din radio, and working climate controls!
- Bend, cut and drill your sheetmetal to make it fit into the cubby. There are some screw holes behind the cubby which you can use.
- Put it all back together. Done!
Notes:
All Subarus from 1995 till the mid 2010s seem to have this same connector with the same pinout as show in the image provided by SVXdc. Always verify with a multimeter.